Anchor Bolt Setting:
- The process of setting anchor bolts commences after securing the pedestal reinforcement.
- A fabricated template, mirroring the exact baseplate with a reduced thickness, typically 4mm, is essential for this phase. The use of thinner plates significantly streamlines the task.
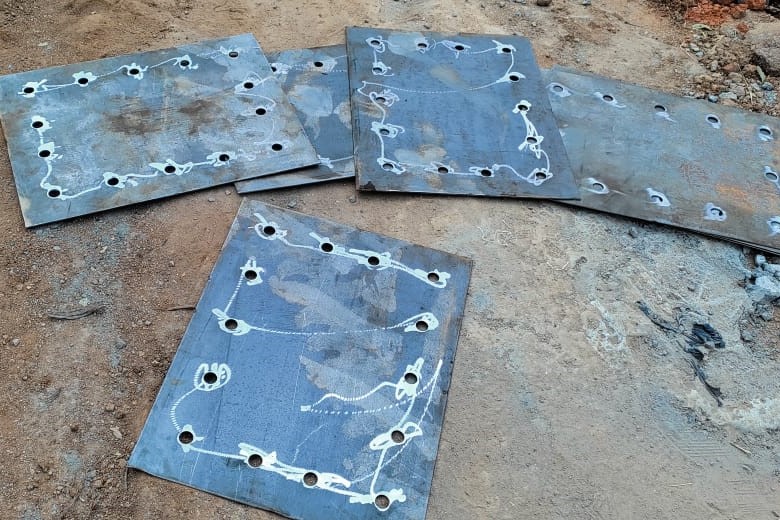
- Position the template according to the baseplate drawing and affix the anchor bolts as specified in the drawings.
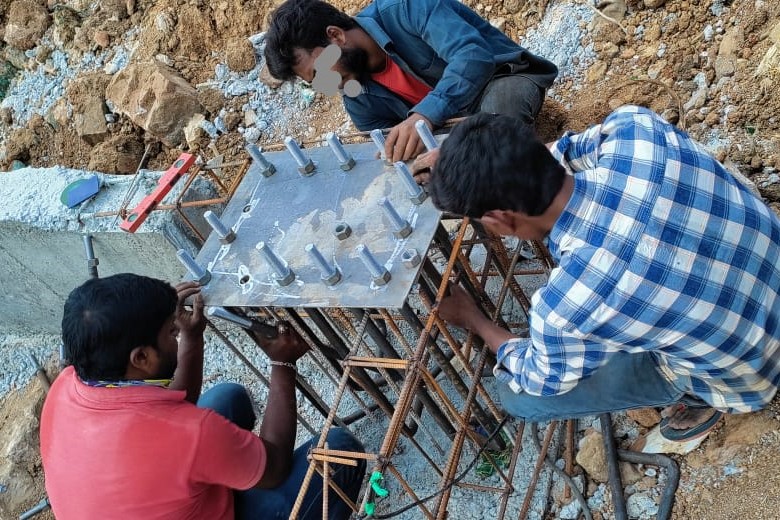
Figure 2 – Fixing the Templates
- Ensure uniformity in the height of the bolt tops across all pedestals, unless instructed otherwise.
- Verify the Template markings meticulously using a total station or equivalent equipment. Weld the anchor rods to the pedestal reinforcement securely.
- Proceed by placing the formwork and confirming the vertical alignment of the pedestal.
- Recheck the Template markings for accuracy.
- Apply tape to cover the threaded portion of the anchor bolts.
- Pour concrete up to the required level.
Erection:
- During the fabrication of the structural steel, base plates and stiffeners are attached to the column, arriving as a single unit at the site. These are connected via fillet welds.
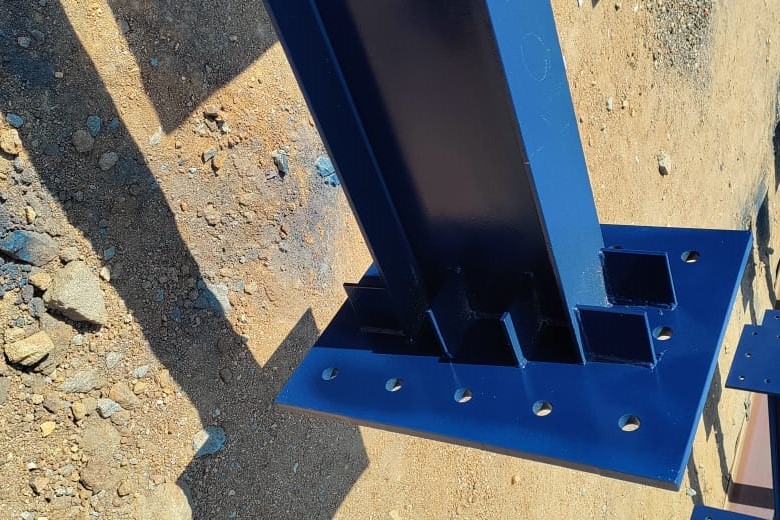
Figure 3 – A fabricated Column
- After removing the template, position the leveling nuts for the anchor bolts.
- Place the column accurately, adjusting its base’s level using the leveling nuts under the base plate. Insert shim stacks between the base plate and pedestal.
- Following the base plate’s placement, snugly tighten the anchor rods to ensure the column remains plumb.

- Attention should be given to determining if the top or bottom of the base plate requires specific elevation.
- Eliminate the shim stacks and fill the gaps beneath the base plate with Non-Shrink Grout.